Header Lines CSV
Updated on
Customize a report with both header and line items in a single CSV file.
If you need a CSV file that includes:
- Header details
- Line item details
you can create this structure using DataChamp.
| Line Identifier | Order Number | Details |
|---|---|---|
| HEADER | #01 | Header details |
| LINE | #01 | Line details |
Step-by-Step Guide to Configuring a CSV Export in DataChamp:
- Create a new report
- Click "New Report", then select in "Orders" the "Basic report".
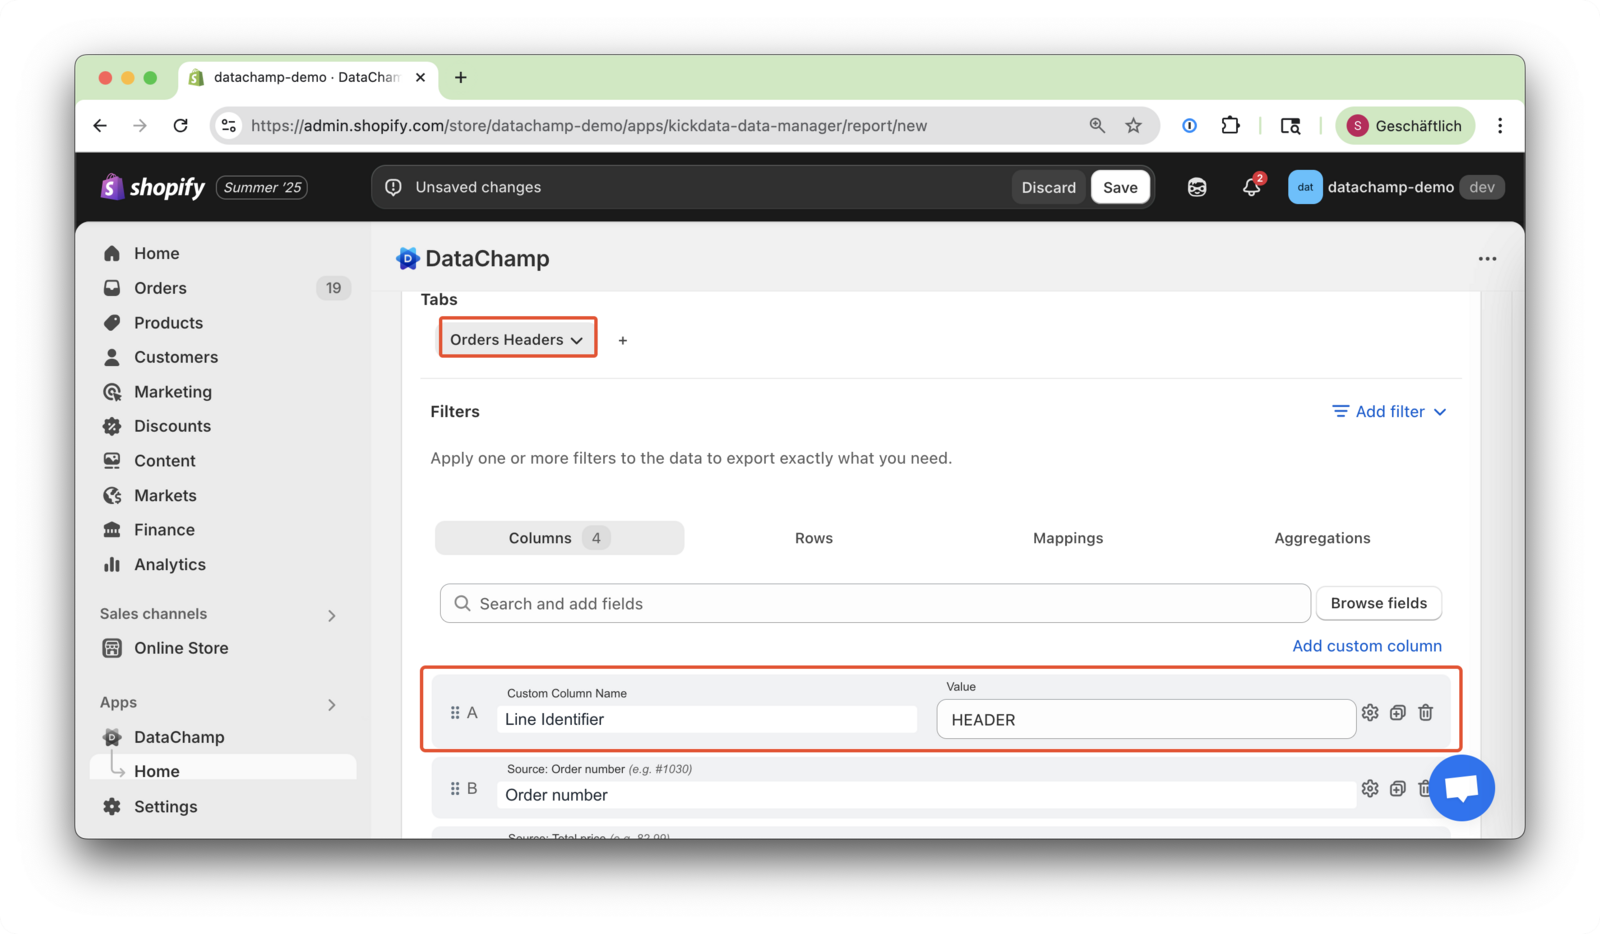
- Rename the first tab
- Change the tab name from "Orders" to "Order Headers".
- Select the order header fields
- Choose the fields you want to export from the order header, including sections like "Order / Shipping Address".
- Add a custom column "Line Identifier"
- Create a new column and name it "Line Identifier".
- Drag and drop this column to the first position.
- Hide the header row
- You can find this option under the "Rows" tab.
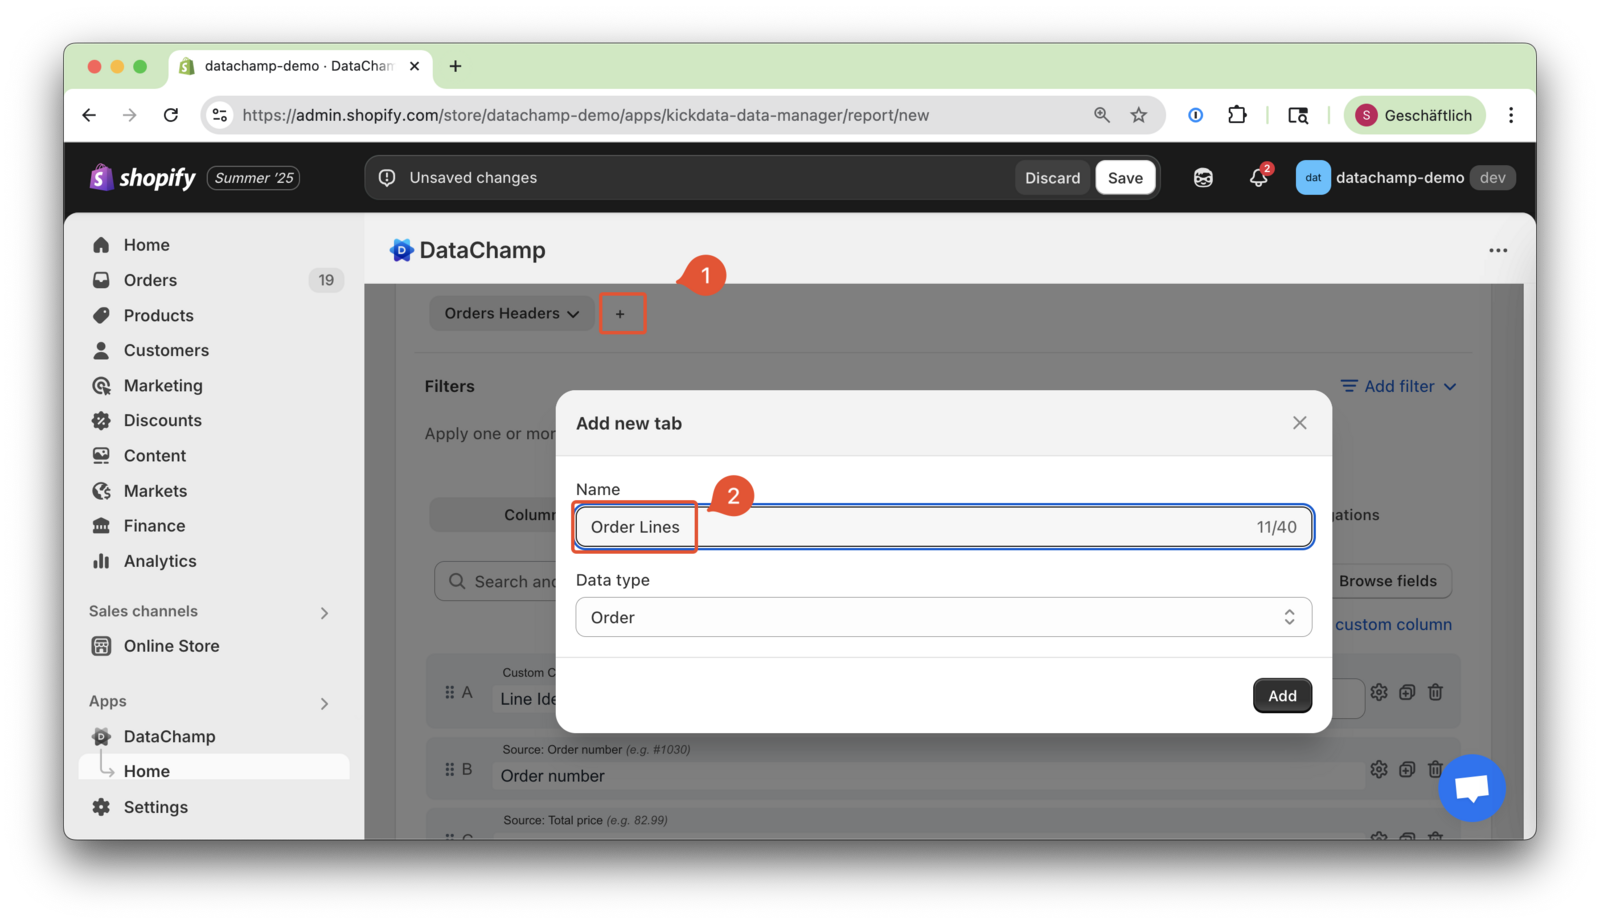
- Add an additional tab for line items
- Create a new tab and select "Order" as the export type.
- Rename this tab to "Order Lines".
- Select the order line fields
- Choose the fields you want to export from the order lines.
- Remove any fields that are already included in the header section to avoid duplication.
- Add any necessary fields from the "Line Items" section.
- Add the "Line Identifier" column
- Set the value to "LINE".
- Hide the header row for the second tab
- Since you already configured "Order Headers," also activate "Hide Header Row" for "Order Lines."
- Set the export mode to "Fill"
- This ensures that the "Line Identifier" column is filled for each order line.
- Click "Export Mode" => "Lines" => "Fill" in the settings panel on the top.
- Configure the file type
- Set the file type to CSV.
- Preview the result
- Click on the "Preview Button" to check to result of the report.
- Save and run your report
- Click "Save & Run" in the top-right corner.
- Review the generated CSV file and make any further customizations if needed.
- If you encounter line limit warnings, apply filters to both tabs (e.g., export only recent orders using the "Created At" filter).