Internetmarke
Updated on
Use DataChamp for Deutsche Post - Internetmarke
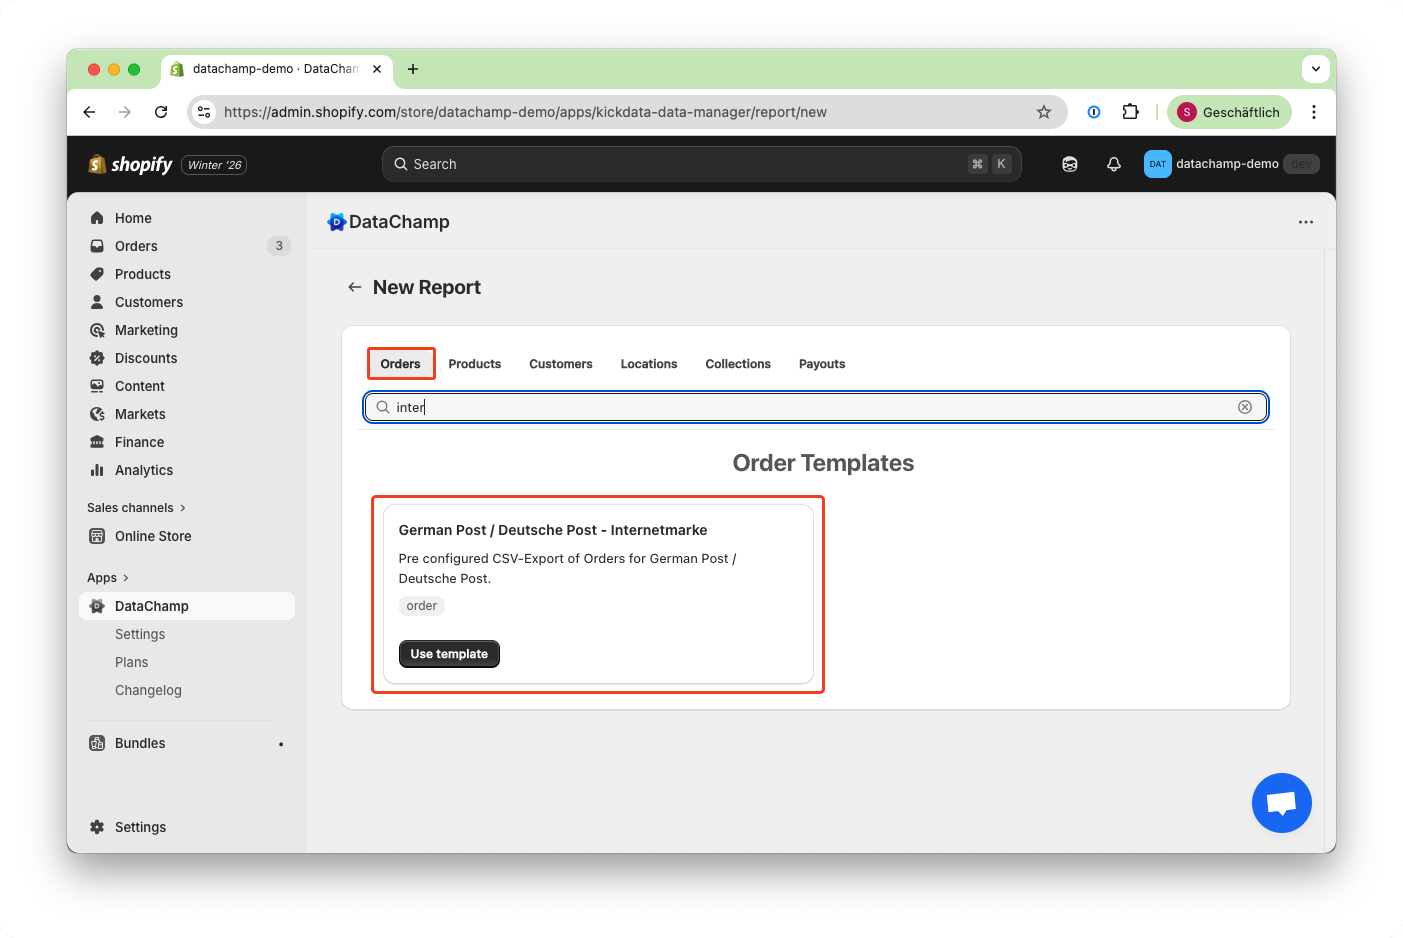
- Create the report "Internetmarke" by using the available template.
- To find the template, click "New report" and select "German Post / Deutsche Post - Internetmarke".
- First, update the sender address in the "Rows" tab:
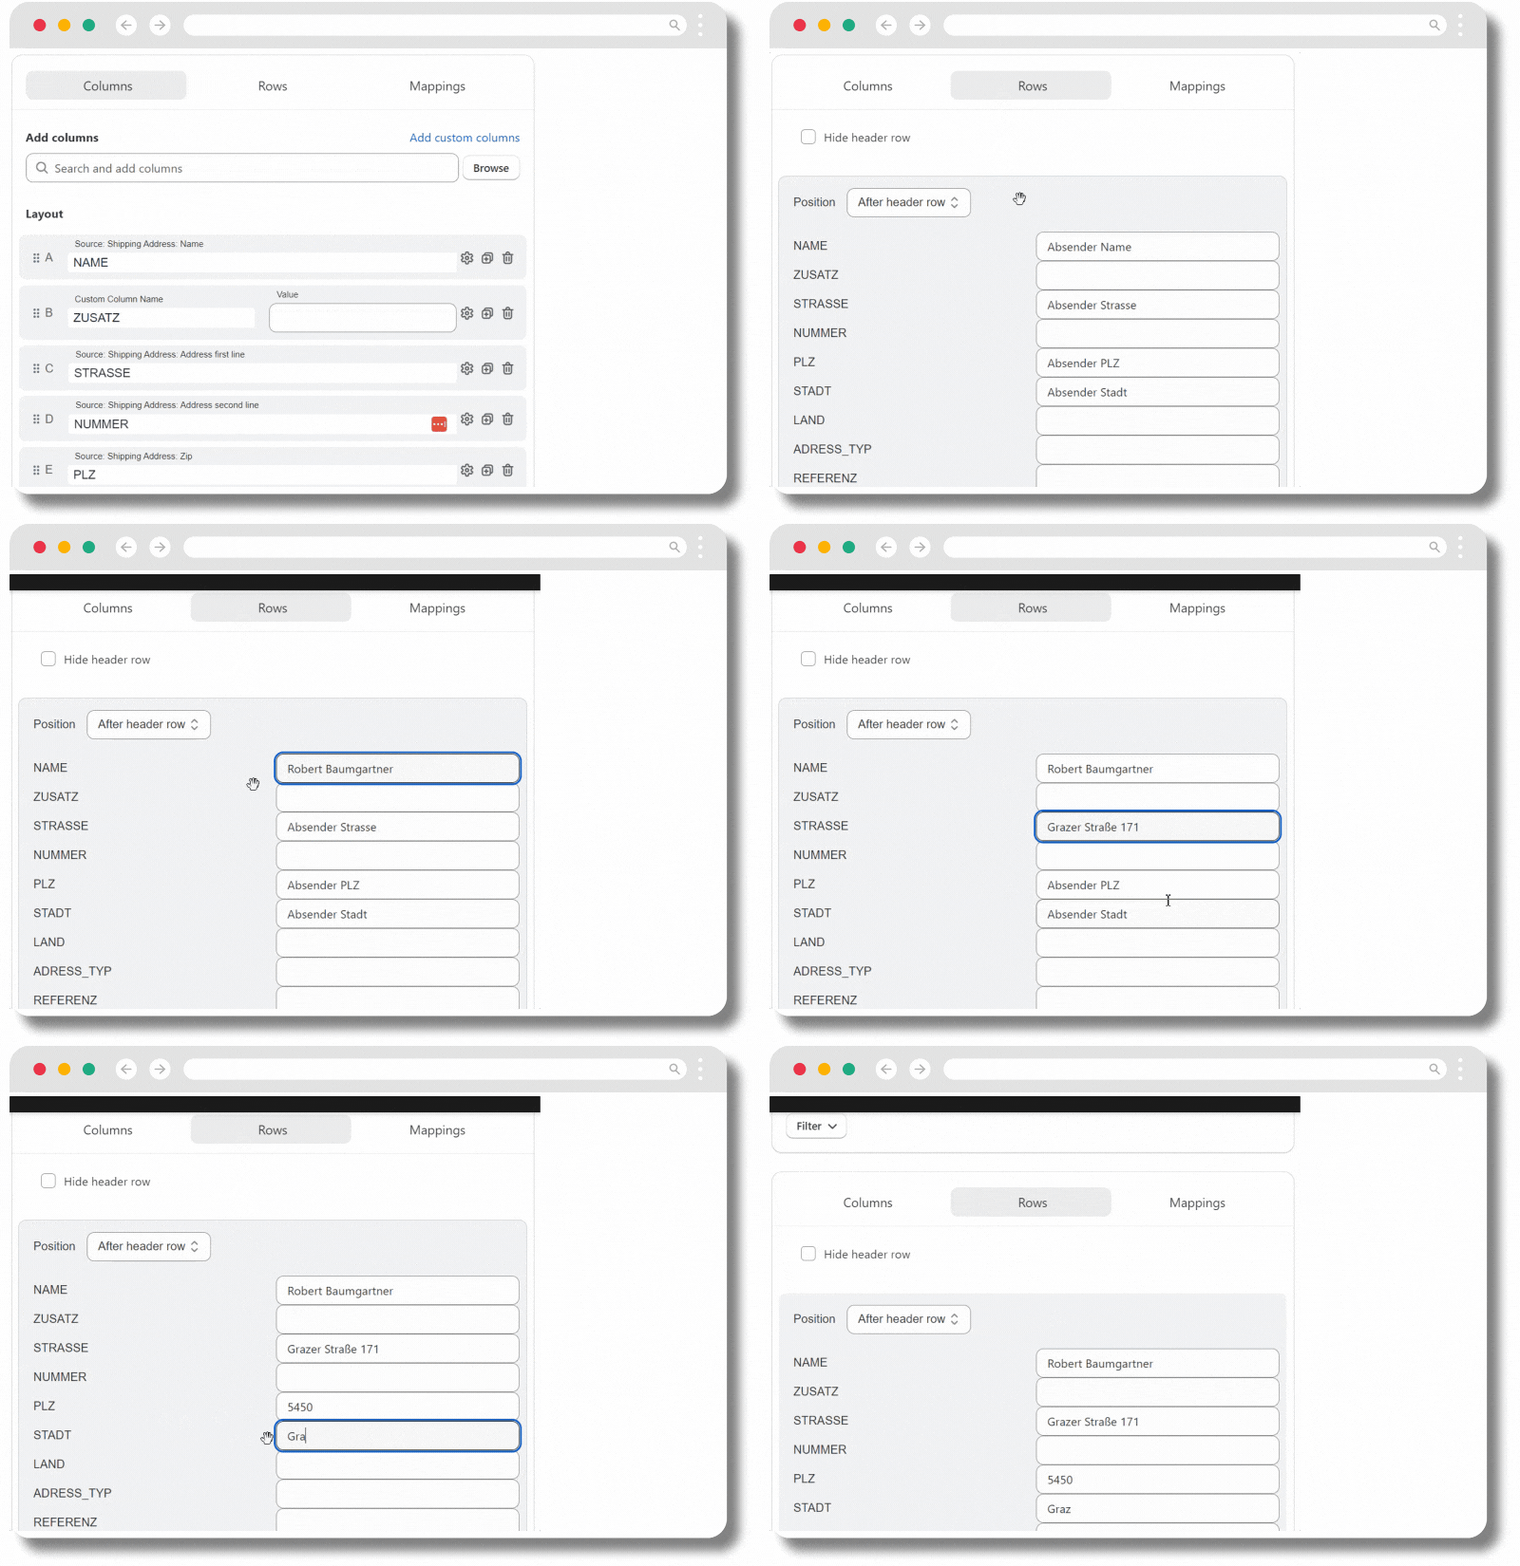
Save your report by clicking on the "Save" button in the right top corner.
Start the export in DataChamp.
- In Shopify, select one or multiple orders, then click "More actions".
- For advanced usage, set up a filter (e.g., "unfulfilled and paid orders today").
Download the CSV file by clicking on the file name in the "Result" column.
Open Deutsche Post Shop and select the appropriate "Internetmarke" based on the weight.
Then click the "Add sender and recipient" button and then select the "CSV import" tab:
Upload the CSV file created by DataChamp by clicking "Browse" and selecting the file.
Start the import by clicking "Upload file".
The addresses will now be displayed and can be transferred to the print set.