How to Set Up Automated Exports with Shopify Flow
Updated on
Shopify Flow is an automation tool for recurring tasks and processes in your online store. It can also start your DataChamp reports. Flow works with simple if-then logic: for example, if a new order comes in, then create an order report. That is what you set up in this article, but you can use all kinds of triggers.
Shopify Flow is a free app and available on all paid Shopify plans (Basic, Shopify, Advanced, and Plus).
What you can do with the DataChamp + Flow integration
The integration lets you start any DataChamp report from any Shopify Flow trigger. You combine the flexibility of Flow with DataChamp's exports: Excel, CSV, TXT or Google Sheets files with the Shopify fields you need, including metafields and custom attributes, delivered to Google Drive, Dropbox, FTP, email or a feed URL, exactly when you need them.
A few examples of what becomes possible:
- Order received → send order report to fulfillment partner via FTP. Trigger a tailored CSV export with exactly the fields your 3PL or warehouse needs and drop it on their FTP server automatically.
- High-value order placed → send detailed Excel report to your accounting team's email. Use Flow conditions (e.g. order value over a certain amount, specific country, B2B customer) to filter, then let DataChamp generate the document.
- Refund created → log it to a Google Sheet for your finance team.
- Product inventory low → export product report to Dropbox. Send purchasing a ready-to-use restock list.
- Customer tagged as VIP → export customer data to Google Drive for your marketing team's next campaign.
- Draft order created in B2B → push order details to your ERP via FTP in your custom import format (e.g. SAP, NetSuite, etc.).
In short: Flow decides when and under which conditions a report runs, DataChamp decides what's in it and where it goes.
Video tutorial
Step-by-step guide
1. Create the report in DataChamp
First create the report that Flow should start. Choose a template or build the report with Start from scratch and select all the fields you need, then click Save. If you need help, see Create New Report or write to us, we are happy to help.
2. Install and open Flow
Shopify Flow is an app from the Shopify App Store. Go to your Shopify admin, open the App Store, search for "Shopify Flow" and install it. After that you open it in your Shopify admin under Apps → Flow.
3. Create a new workflow
Flow opens with the list of your Workflows. Click Create workflow 1.

4. Select a trigger
Click Select a trigger.
Search for the event that should start the report, for example "order", and select Order created. The workflow then starts when a new order is created.
5. Add the DataChamp action
Now decide what should happen when a new order is created. Click the + sign below the trigger 1 and then Action 2.
Select or search for DataChamp and click Start DataChamp Export.
6. Select the report
In the configuration of the action, click Select Report. The page Use Existing Report opens. Tick the report you created earlier 1 and click Save 2.
7. Export only the order that triggered the workflow
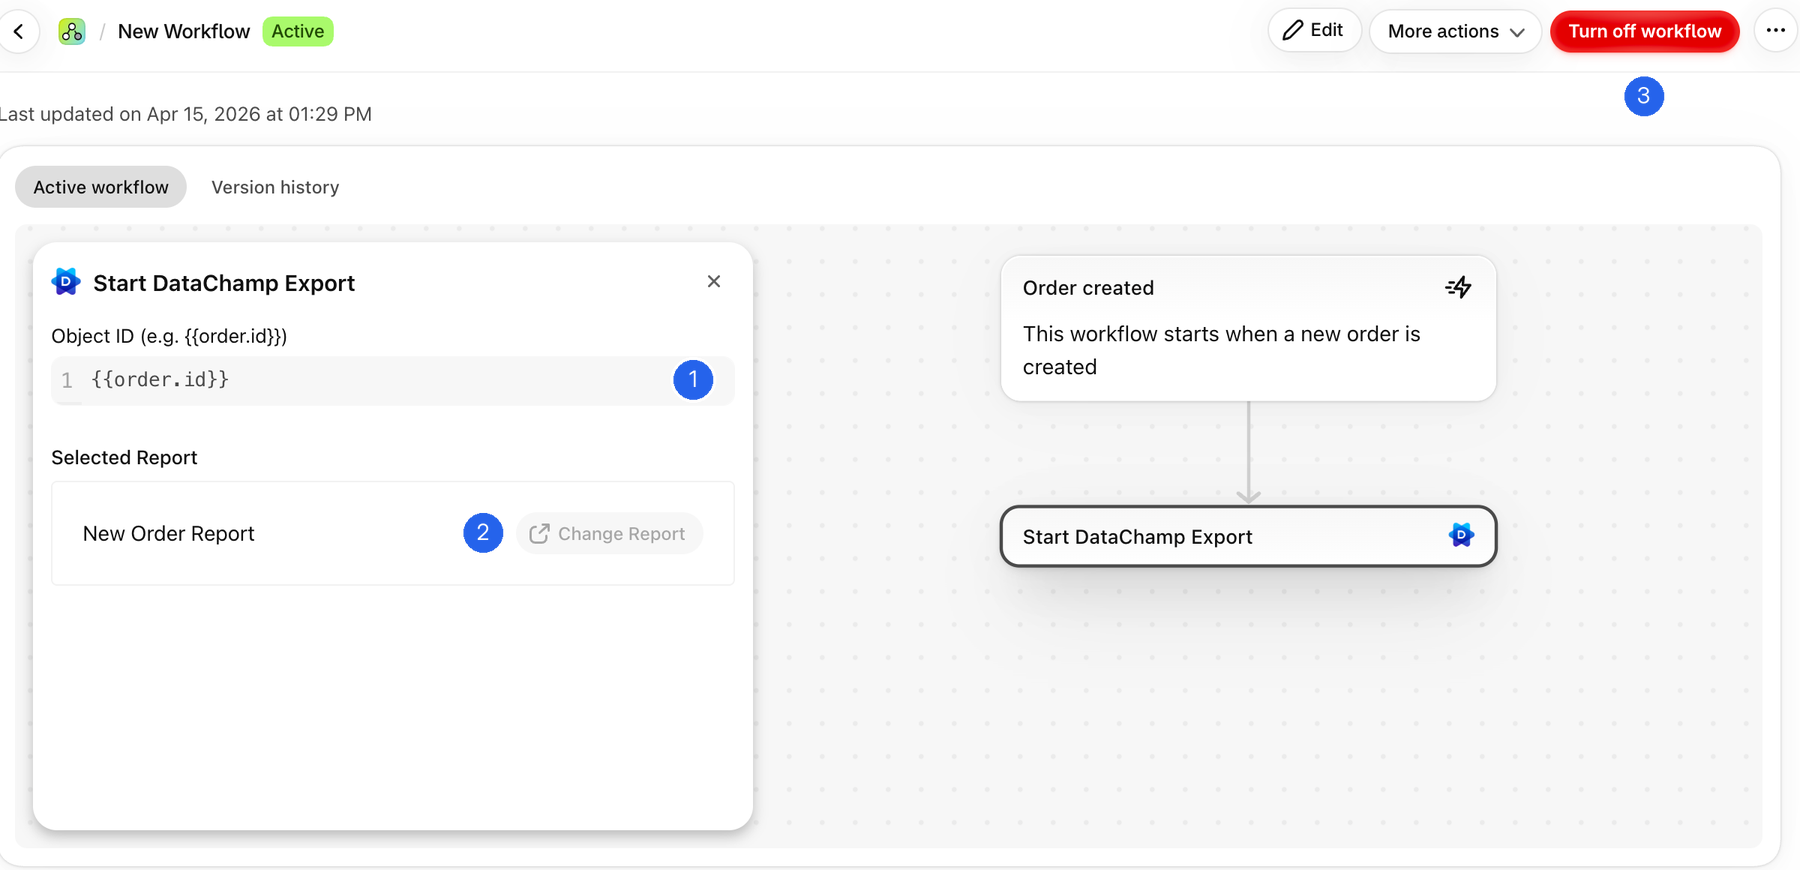
If the report should only contain the new order, enter {{order.id}} in the field Object ID 1. If you leave the field empty, the report exports all data that matches its filters. Below the field you see the Selected Report 2.
8. Turn on the workflow
Click Turn on workflow at the top right. The workflow is then shown as Active, and the button changes to Turn off workflow 3.
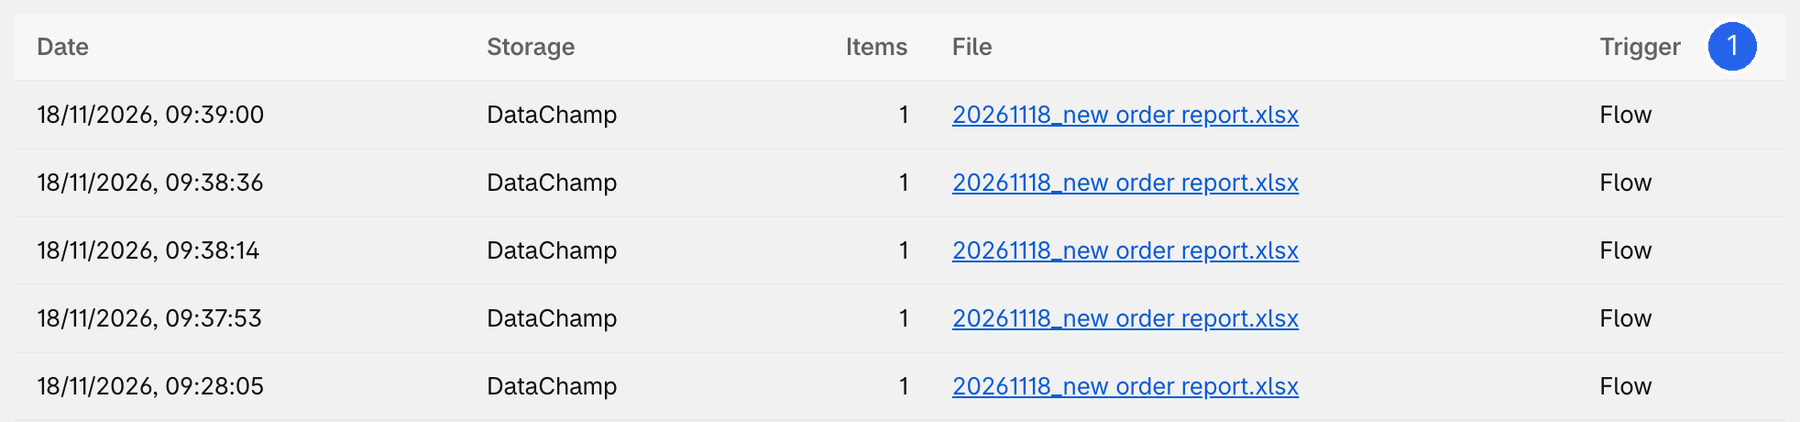
From now on, every new order starts the report in DataChamp. To check it, open the History of the report in DataChamp via the three dots in the dashboard. Runs started by Shopify Flow show Flow in the column Trigger 1, and each of them contains one item: the new order.